
So you always wanted to sell things online. You can have an online shop on your WordPress website, where you can sell your products or services. I am going to show you how to set up an online shop for your WordPress website using WooCommerce.
Today’s tutorial is part of our series Master WordPress.Here’s an overview of the upcoming blog posts from this series:
How to set up and customize menus in WordPress
How to add custom fonts to WordPress
WordPress sidebar design- best practices
How to set up an online shop on WordPress (this post)
Note: There are some things you should have in place before you can get started with this tutorial.
- Self-hosted WordPress website (with a domain name registered)
- WooCommerce-compatible theme. I recommend BluChic's themes or Restored316.
- SSL Certificate to secure your client's data (can be purchased from your hosting provider)
- Digital or physical products you would like to sell. This is of course up to you.
- A way to receive payments (the so-called payment gateways, e.g., PayPal, Stripe etc.)
Do you have the things on the list? Let's get started!
WooCommerce is one of the best e-commerce plugins for WordPress out there. It is packed with all the functionalities you need, plus it's completely free. The only thing you need to pay for is your payment processor.
Step 1: Download and activate the WooCommerce Plugin
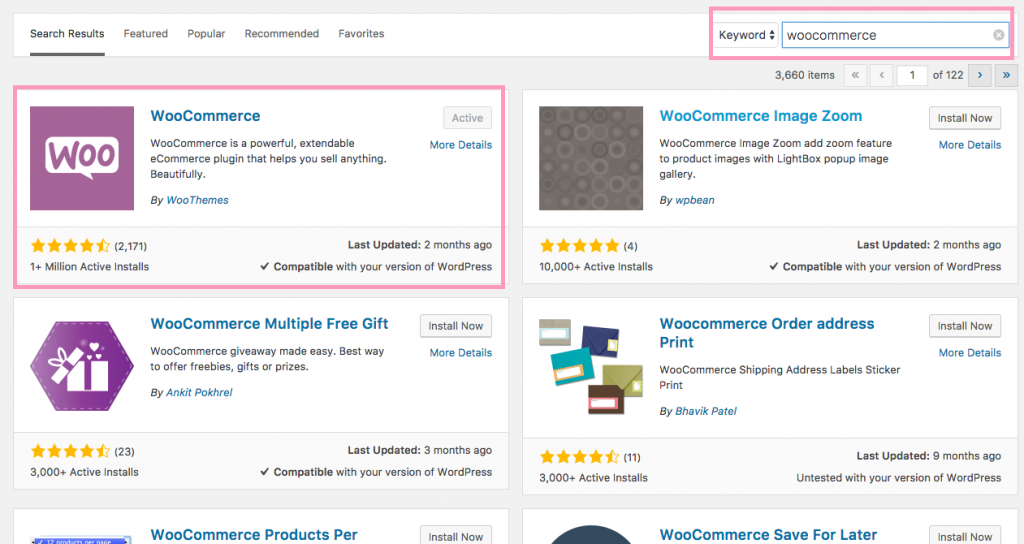
Log into the WordPress admin area and from your dashboard, go to Plugins > Add New. In the search bar type in "woocommerce". Locate the first search result and install it. After that, activate the plugin.
Step 2: Run the setup wizard
Once you have activated the plugin, a message similar to this one will appear on your dashboard, prompting you to start the setup wizard.

Once you click on the purple button, WooCommerce will start the setup process. Sit tight!
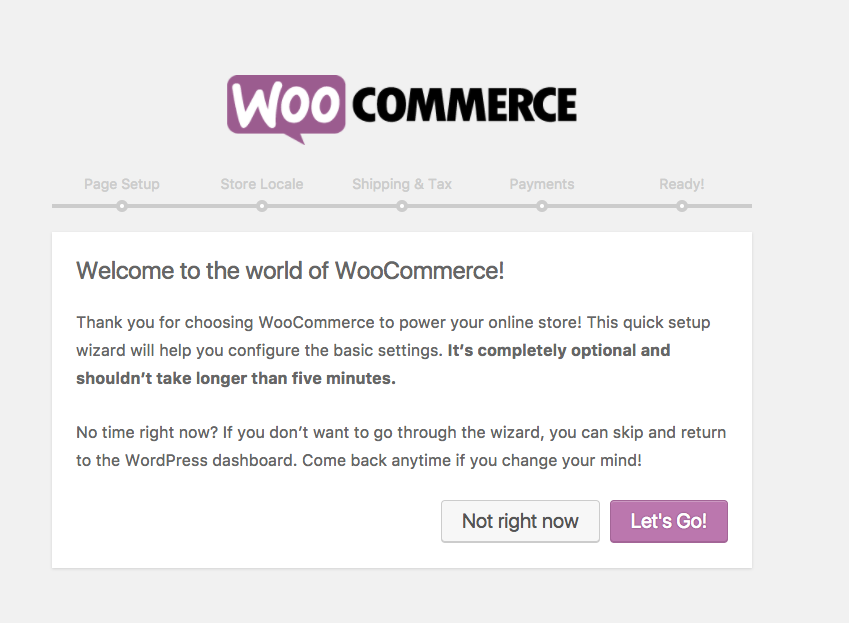
Click on Let's Go. This will open a full-screen window where you will be guided through the installation process.
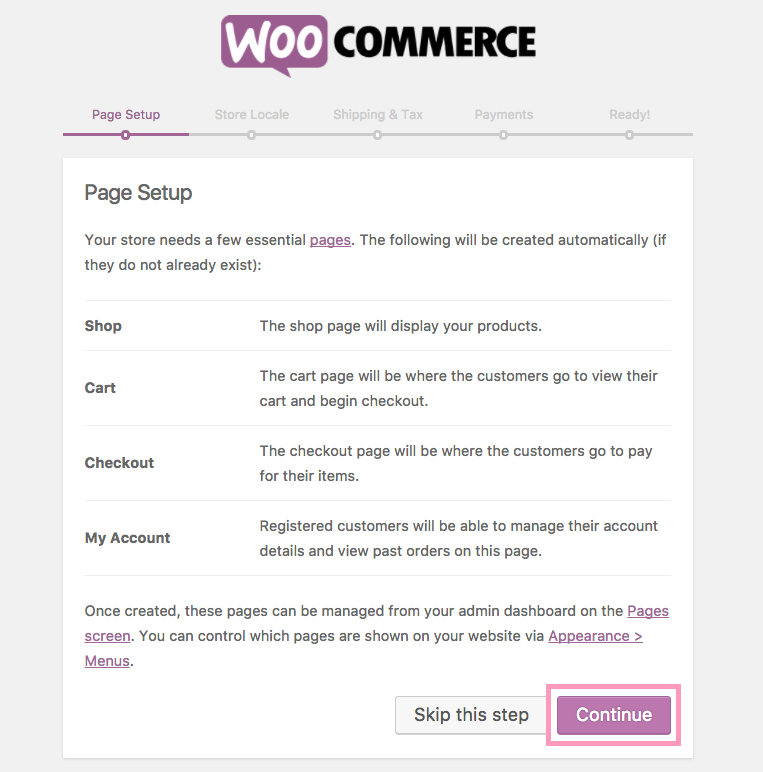
Page Setup
Once you have started the wizard, as a first step, it will want to create a number of pages which are required for the plugin to operate. These pages include a Shop page, which will display all of your products, a Cart page, which will be visible to your customers, a Checkout page, which will provide overview and payment options for your buyers, and an Account page where your registered buyers can manage their details and see past orders.Note: If you have a demo content installed on your WordPress website, double-check if it includes those pages. If it does, just click on skip this step. Worst case scenario, you will have to delete the pages installed via the wizard.
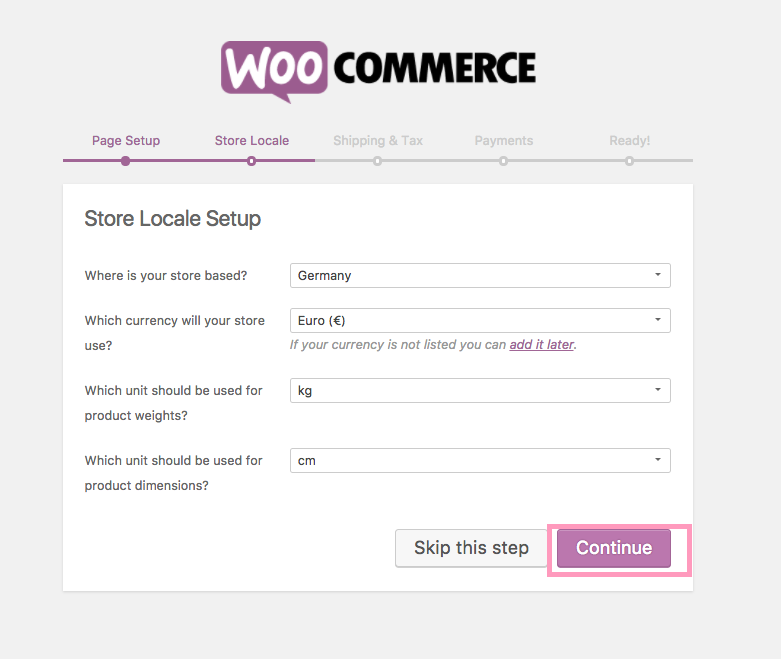
Store Locale
In this step, you need to choose the location of your online shop as well as your currency. If you are planning to sell physical products, you might want to select the weight and height units as well. Fill out the information and hit Continue.
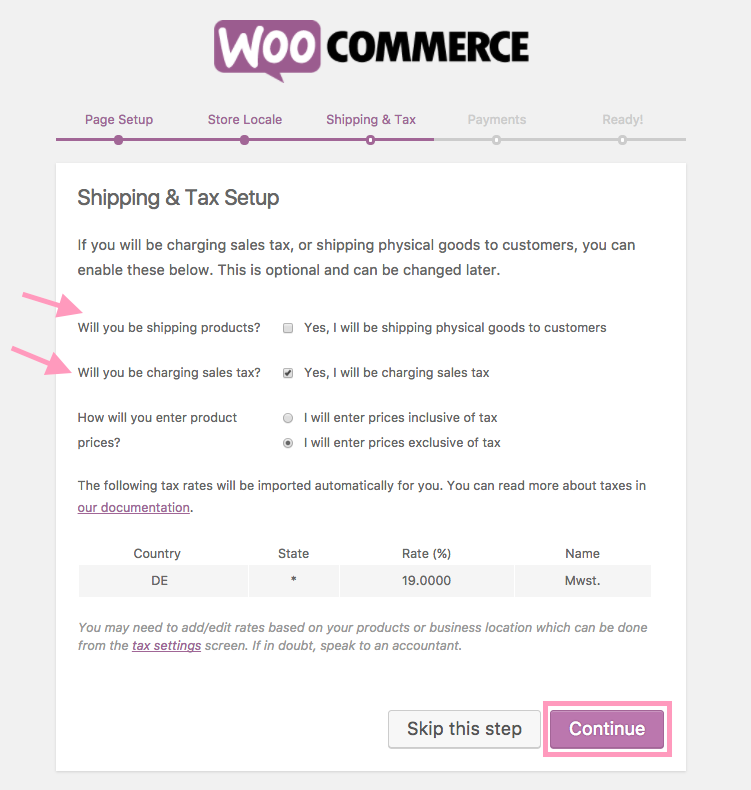
Shipping & Tax
Depending on whether you will be selling digital or physical products, you should specify the sales tax and whether you will include it in your shop prices. I strongly recommend that you have a talk with your tax advisor about this.If you are not sure, just leave all boxes unchecked and hit Continue. You can always go back to this section and adjust the required information.
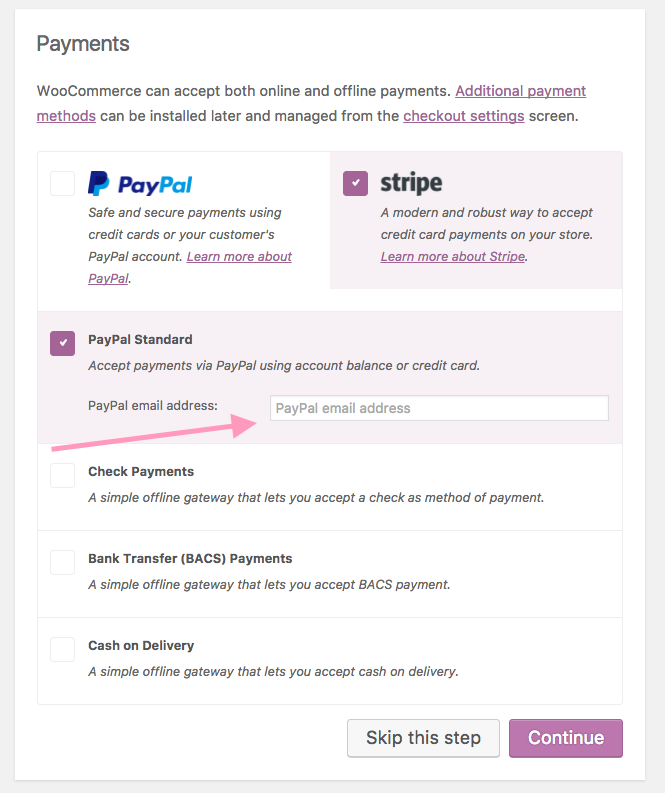
Payments
As every online shop, you will also accept payments from your buyers. WooCommerce offers integrations with several major payment processors. I use PayPal and Stripe, but if you are not registered anywhere, the easiest and quickest way is to set up a PayPal account.

If you for have a PayPal account already, check the PayPal Standard options and insert your email address. This is the easiest and fastest option. Remember, you can always go back to this section and add more payment options later on.
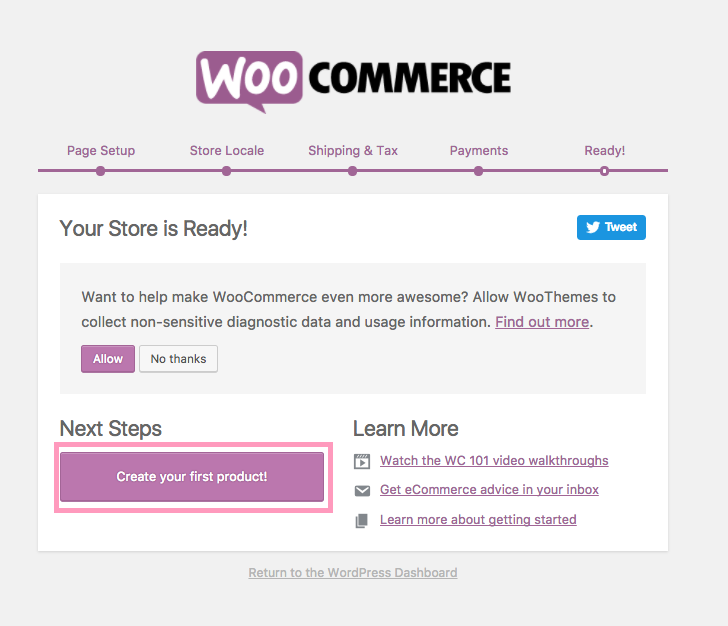
You are done with the setup wizard
This is the last step of the quick setup using the WooCommerce wizard. You can close the wizard and go back to your dashboard or directly continue by adding your first product.
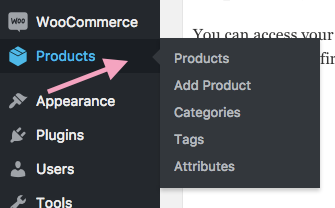
Step 3: Add your first product
You can access your WooCommerce settings as well as add new products directly from your Dashboard. Go to Products > Add New in order to add your first product.
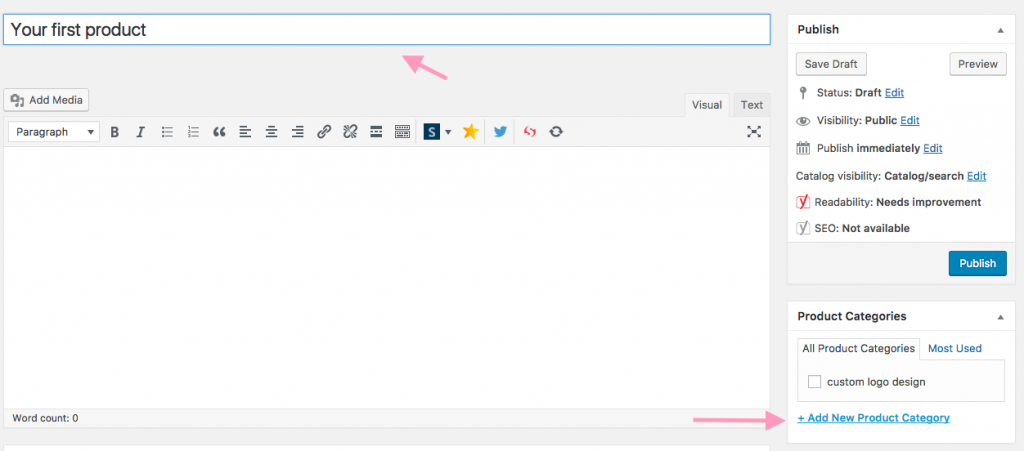
Add title and product category
A new window will pop up where you can enter a title for you product, set up a product category and manage a bunch of other settings. Product categories are very useful to your buyers as they can browse through your shop and sort products easily.
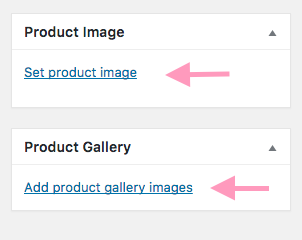
Add product images
You can add one featured image, which will be used as the main product image for your product. In addition, there is no limit to the amount of images you can add to the product gallery. Click the blue link in order to add the desired image(s).
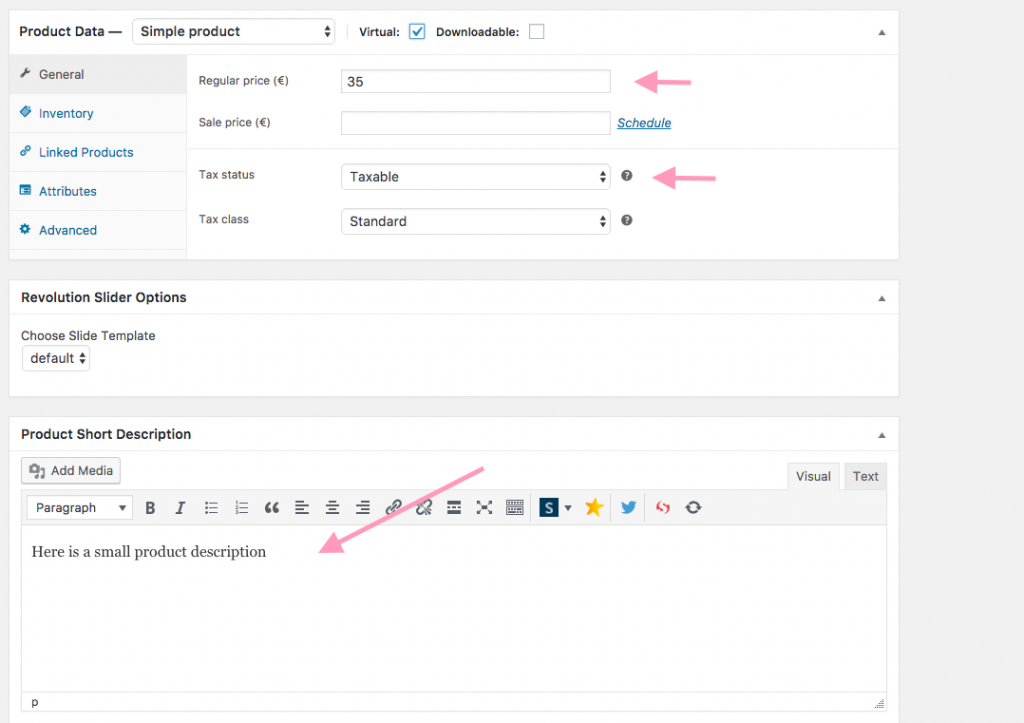
Product data box
If you scroll further down, you will see the WooCommerce product box. This is where you can adjust the price, add a sales price, configure the tax status, etc. Browse around the different options to get a sense of what you can do. Below the product data, you can find the short product description text box.
Once you have added all the relevant product information, click on the Publish button in the upper right corner of your screen. Your new product is now live on your page!

Note: Depending on the theme you are using, your product page will look different. Same thing applies to your cart, checkout, and shop pages.
Step 4: Configure the shop page
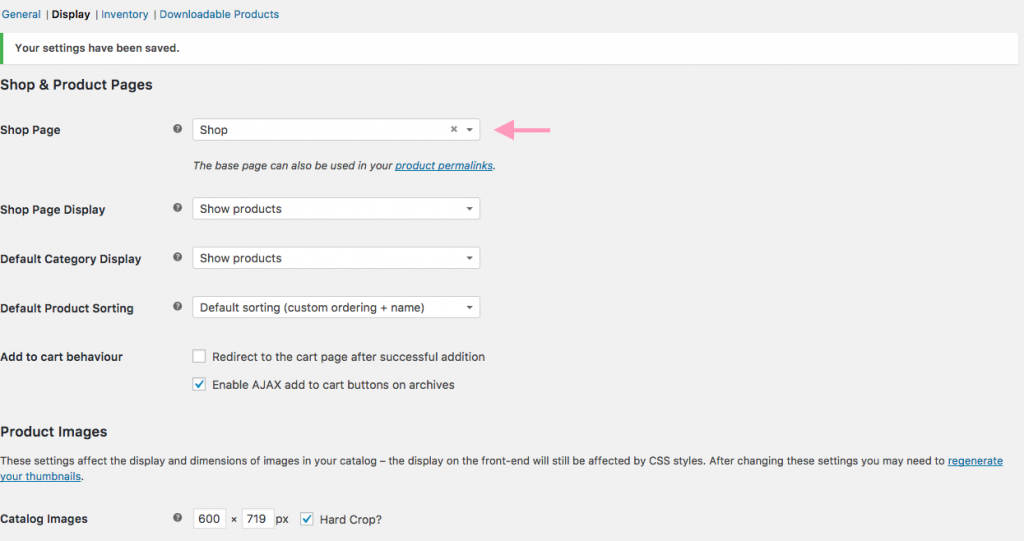
You should have a shop page created automatically with the setup wizard, however in order for your products to show up on your shop page, you should tell WooCommerce which page will serve as your shop. You can do this by going to WooCommerce > Settings > Display.From the drop down menu, select the desired page and click save. Your shop is now live! You can add your new page to the main menu and link it in your header.
Step 5: Fill your shop with products 💜
After adjusting the main settings, you should take a couple of days in order to fill in your online shop shelves and start selling online!
Final thoughts
This tutorial shows just the basic steps of how to set up an online shop in WordPress using WooCoomerce. There is a lot more fine-tuning that needs to be done once you go through those steps. Make sure you explore the settings section (WooCommerce > Settings) and adjust it to your preferences.
I hope this article will help you with setting up your first online shop! If you have any further questions, just drop them in the comments below!