
Disclosure: This post contains affiliate links. By clicking on the links and purchasing something, I will earn a small commission. This helps me deliver great content for free. Thank you for supporting Lipstick and Pixels!
If you want to take your blog or online business to the next level, you should start building an email list. One of the tools I have been using for a few months now is ConvertKit. It helps me run my blog and automate a lot of the email marketing tasks like segmenting my email list, sending welcome messages to my new subscribers and sending an email course to selected people that opted in. In this step-by-step tutorial, you are going to learn everything you need for getting started with ConvertKit.I was using MailChimp in the past, but I decided to go all in on CovertKit for Lipstick and Pixels and I have to say, I am very happy that I did!Please note: ConvertKit doesn't have a free trial and it starts at $ 29/month, even if you have 0 subscribers. Either go all in or wait until you have a few hundred subscribers to try it out.
You should try ConvertKit if you want to:
1. Grow your email list fast2. Have a tool which can help you to "set it and forget it"3. Offer freebies to your readers. Here are a few examples: ebooks, email courses, bundles or free stock photos.4. Create landing pages ( as you can do that in ConvertKit)Segment your email list and understand better the needs of your readers, so you can serve them better with your content or services. Bam!
ConvertKit vs. other email service providers
As opposed to other email marketing software out there, ConvertKit gathers all of your subscribers in one master list. No more multiple subscriber lists with duplicate email addresses (like in MailChimp). This means one person can opt in for a freebie on your blog on day 1, then decide to sign up for your free email course on day 20 and download your free printable on day 45. This person will only be counted ONCE by ConvertKit. How awesome is that? :)So, how do I segment my list you may be asking?You can tag your subscribers based on interests, actions, and other rules you set up in your account. Also, you can create segments which are basically lists of subscribers that match a certain rule you have previously defined.Now, if you are still reading this blog post, chances are you are already a ConvertKit fan or you are planning to sign up and ... you are probably wondering where to start. Let me break it down for ya!
Step 1: Complete your account details
Once you have signed up for ConvertKit, you should go ahead and confirm your account so you can start sending emails.Also, make sure to set up your "From Name", which is basically the name your emails readers will see in the From field in their email inbox. To do this, click on Account and then under the settings tab click on Email.Note: If you are planning to use ConvertKit on multiple sites, you have to add and confirm all of your email addresses here.
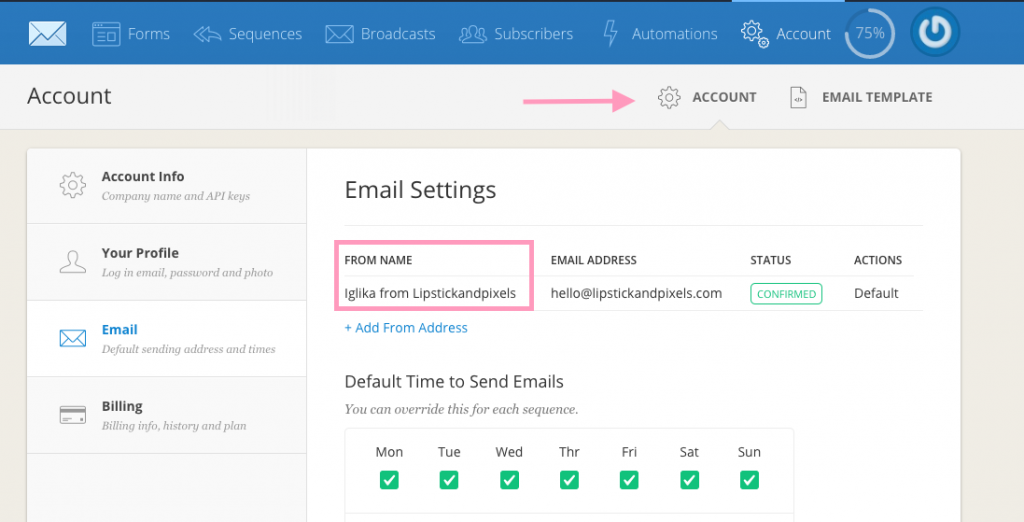
I have set mine to "Iglika from Lipstickandpixels" because I would like to remind my readers about who I am and what my page name is, but you could set yours to whatever you like.
Step 2: Import your existing subscribers (skip if you have no email list yet)
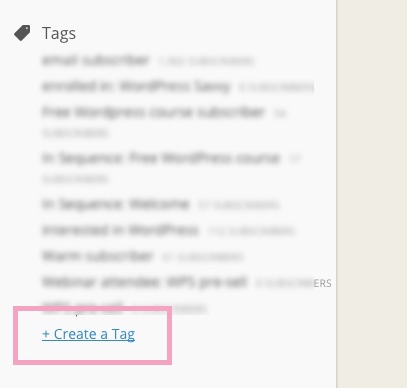
If you are new to the whole email subscribers things, then you can skip this step. If you already have an existing list of subscribers, then keep reading.The very first thing you should do before you upload your existing subscribers is to add a new tag. You should do this because it is important to start segmenting your subscribers from day 1.From the main menu go to Subscribers and then under Tags on the right-hand side click on the Create a Tag link.
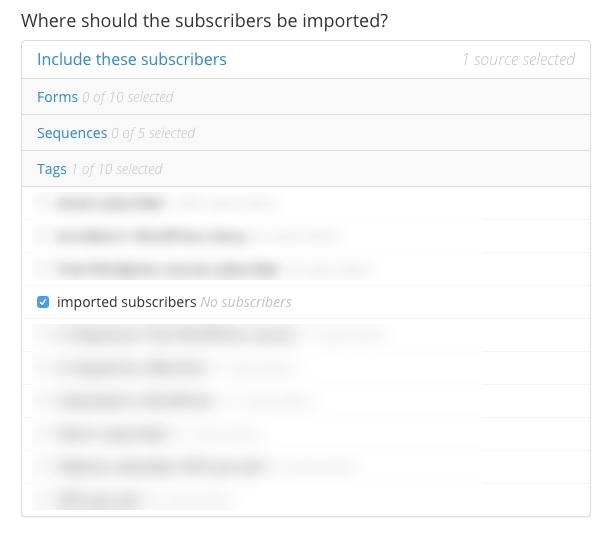
If you already have lists inside your current email subscriber, you may want to add a new tag for every list you have. This way you will know where your subscribers came from! You can, for example, simply create a tag called "imported subscribers".
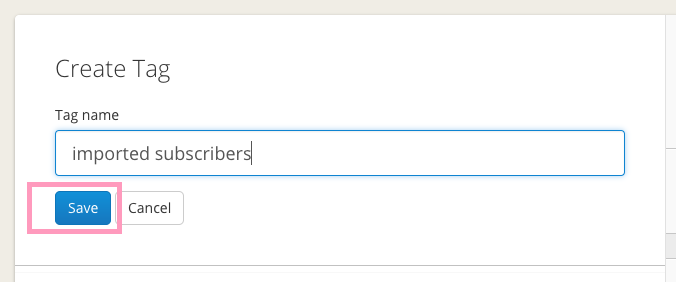
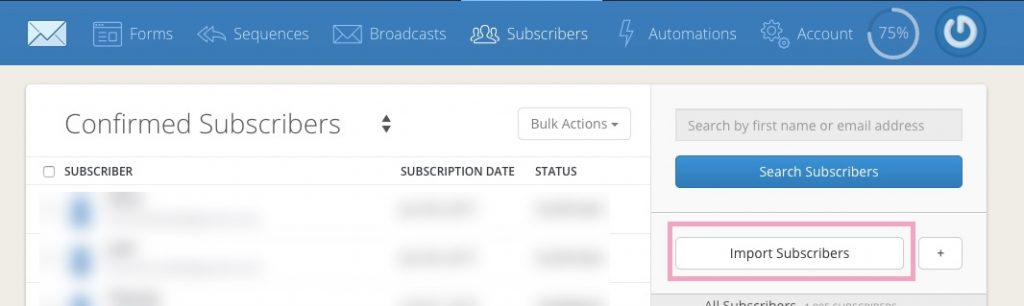
Click on the Save button after you're done. Now you are ready to import your subscriber list.To add your existing list of subscribers, first, make sure to export it from your current email provider and save it as a .CSV file. Next, click on Subscribers in the main navigation and then click on the Import Subscribers button.
You will be prompted to upload your .CSV file. Make sure to import your subscribers into your newly created tag "Imported Subscribers".
Next, make sure you map the columns in your .CSV sheet to the correct fields inside ConvertKit. Simply select the correct file from the drop-down list.
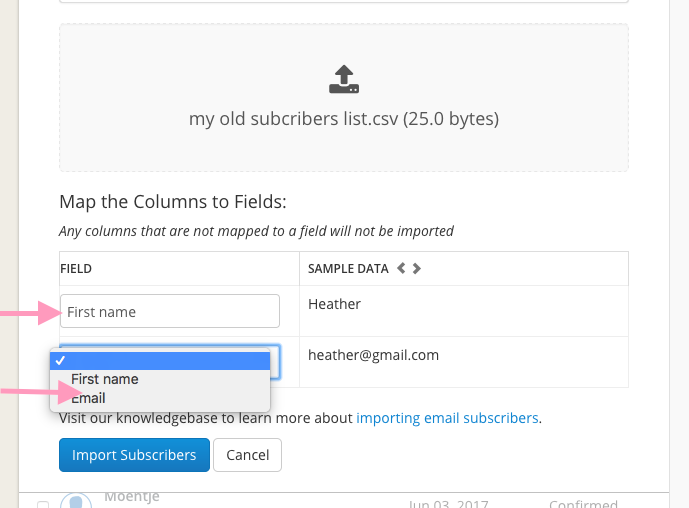
Once you are done, click on the Import Subscribers button. Repeat this process for all lists from your old email provider.
Step 3: Create a form
It's time to create your first form and start gathering new emails with ConvertKit. Navigate to the Forms tab. If this is the first time you are using ConvertKit, your dashboard will look something like this:
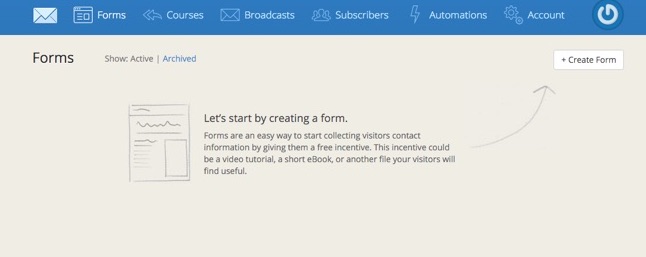
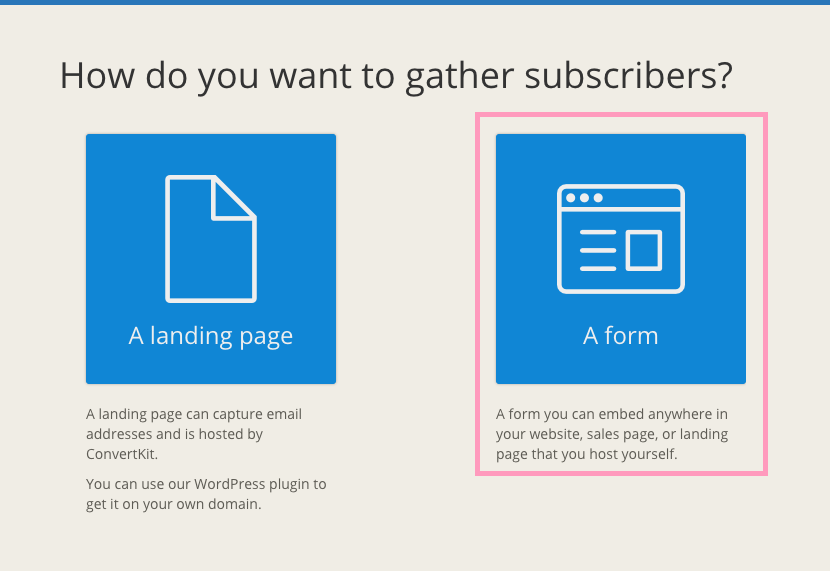
You will be prompted to create a form in order to start gathering emails. Click on the Create Form button in the upper right corner of the screen. Next, you will be prompted to choose between a form and a landing page.For the purposes of this tutorial, we are going to create a form, which can be embedded on your website. So, click on A form:
There are three types of forms to choose from:
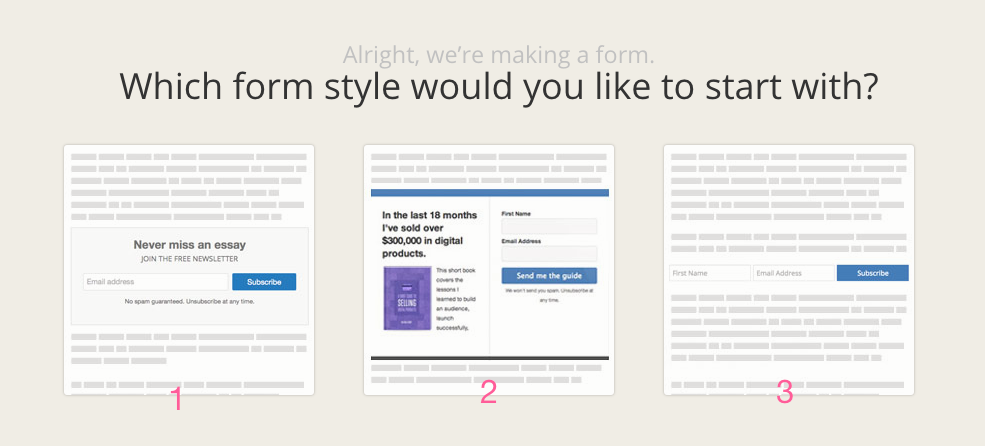
- This is a simple form that contains a title, a subtitle, and an email address field.
- This form has an image on the left side and a name and email address field on the right side. It's best for free guides and ebook opt-ins.
- This form, also called a "naked" form ( hence almost no styling), is by far my favorite one. It's simple, yet effective! It allows you to gather the first name and the email of your subscribers.
So, I am going to choose number 3.
As a next step, you need to style your form. You can change the button color, the text color, and the accent color of your form. Just click on that magic stick and select the color of your choosing. If you have a brand color palette, use your brand colors here.
You can not only change the colors, but also the text of the subscribe button. I personally never use the text "subscribe"on my buttons, as I usually offer some sort of an incentive to my subscribers. Instead, I use "get the list" or just "give me the freebies". You get the idea.Once you are happy with the styling of your form, it's time to configure the settings.
Settings configuration
Main settings

Once in the Settings area, make sure to change the name of your form. Your form name is visible only to you and you can see it on your Dashboard when you log into your ConvertKit account. Choose something that is descriptive. For example, your blog post name.After that, you should go ahead and change the success message. This is the message your subscribers will see once they fill in the form fields and click on the subscribe button. It gives them instructions to log into their email account and check their emails. Why? Because this is part of the so-called double opt-in process which basically prevents you from gathering fake email addresses. For more information on what double opt-in is and why you should be using it, read this article.
Alternatively, you can redirect the subscribers to another page. It could be a thank you page hosted on your website or an external page.Once you are done with these adjustments, click the Save Form button!
Incentive Email
Navigate to the Incentive Email tab. Since we will be using double opt-in, we need to configure the incentive email- this is the email people will receive the confirm their subscription.
If you change your mind and don't want people to confirm their emails, you can always turn it off by clicking on the send incentive/double opt-in emails to your subscriber checkbox.You can configure the From email and the email subject title. If you are sending some sort of a freebie, your subject can go something like this: "Confirm your subscription and get the free e-book", or whatever your freebie is. You can edit the email text and the button text as well!In addition, you can select what will happen after people opt into your list. If you want to offer them a downloadable freebie, you need to scroll down to the Thank you page area and select Incentive Download. After that, upload your freebie and click save.If you wish, you can redirect your new subscribers to a thank you page. By default, they are shown a success message hosted by ConvertKit. You can create your own thank you page and redirect the subscribers here if you wish.
Style
You are almost done with setting up your form. As a next step, you need to choose the style of your form. Remember, we already chose a form style above so I plan to stick to the naked form style. Also, you can choose how the form will appear on the website.
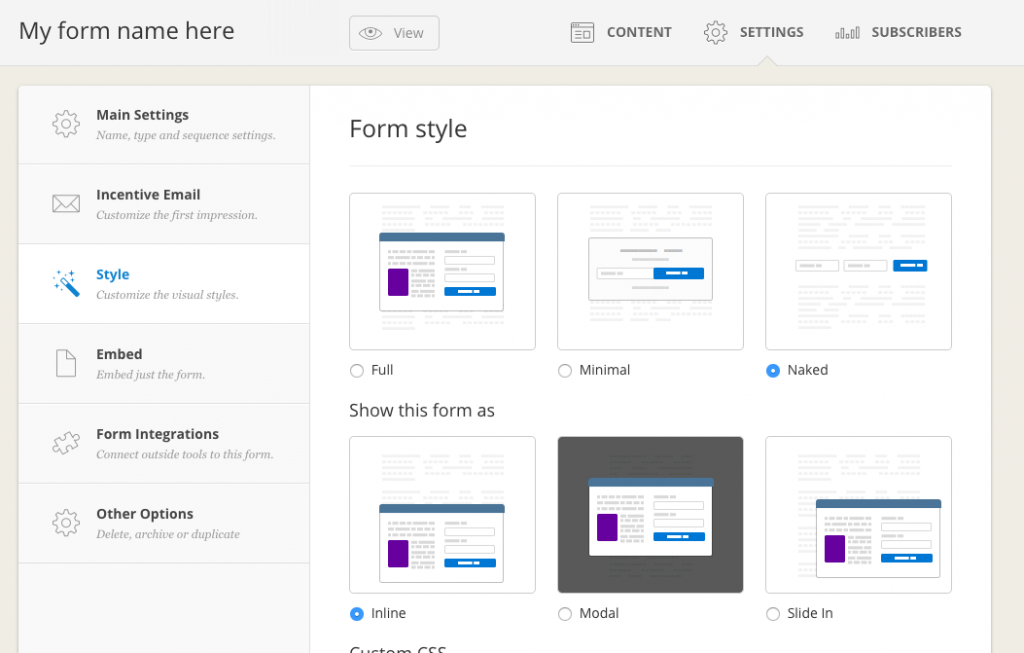
Inline means you can insert it into your content.Modal is basically a pop-up.Slide in is the widget-style form that literary slides in once you start scrolling the website.I am sticking with inline because I would like to embed the form inside a blog post.
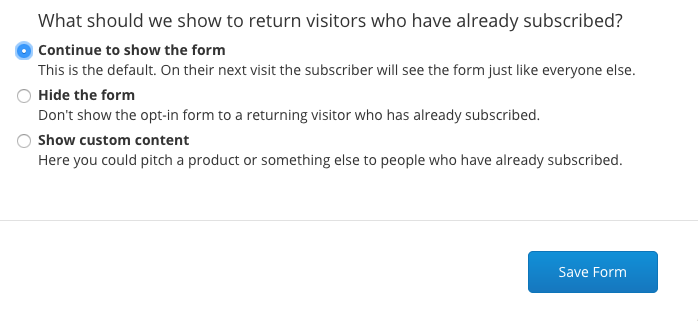
In addition, you can choose what will happen after a user has already subscribed to your form. If you don't want to annoy your readers, you should check the second option.Once you are happy with all the settings above, don't forget to click on the Save Form button.
Step 4: Add the form to your website
Finally, you are ready to integrate your form on to your website. This is the last step in my Getting started with ConvertKit tutorial.Navigate to the Embed tab in the settings options.

There are three ways of embedding your email subscription form onto your website: Javascript, Raw HTML, or WordPress.
Option 1: Javascript
You can copy and paste the Javascript code where you want your form to appear. Compared to Raw HTML, this code is much shorter and loads a bit faster. Also, you can embed your Javascript code on your WordPress or SquareSpace website, too!Personally, this is my favorite option and this is how I integrate all my forms on lipstickandpixels.com.
Option 2: Raw HTML
The second option you can choose from is html. The disadvantage here is that if you want to make any changes to your form, you would have to come back and copy and paste the html code again. Compared to Javascript, where you don't need to change anything even if you decide to make changes to your form.
Option 3: WordPress
ConvertKit has its own WordPress plugin, which you can download here. If you have a WordPress website and are used to using shortcodes, then you need to first install the ConvertKit plugin and then copy and paste the shortcode where you want to place the form.
Pasting the code into the WordPress editor
A small hint for all WordPress users: when pasting the Javascript or HTML code, make sure you have switched to Text view otherwise, you will see a bunch of code instead of your form.
Summary
Getting started with ConvertKit is super easy and it doesn't take a long time to set up your first form and start gathering emails! All you need to do is to confirm your account, create a new form, edit the styles, configure the incentive email, and copy and paste the code into your website.I hope you enjoyed my ConvertKit tutorial. If you want to sign up for ConvertKit you can use this link.
If you have any tips or questions about getting started with ConvertKit, please comment below!
ConvertKit is one of the tools I use to run my online business. Read the full list of my Recommended Resources.