
I bet you've seen that some bloggers have a custom signature, which appears at the bottom of their blog posts. You've been probably wondering "How do I add a custom signature to my blog posts?!" Well, I have the answer for you!:)In today's tutorial, I am going to show you my step-by-step guide for adding custom signatures to your Wordpress blog/website. Best of all, there are no coding skills required here!
Step 1: Create a custom signature
The first step of the process is to actually create a custom signature. You can do so in Canva, Photoshop, Illustrator, or any other tool that you feel comfortable with (I also offer this as a service in my Etsy shop).
Step 2: Upload your custom signature to Media Library
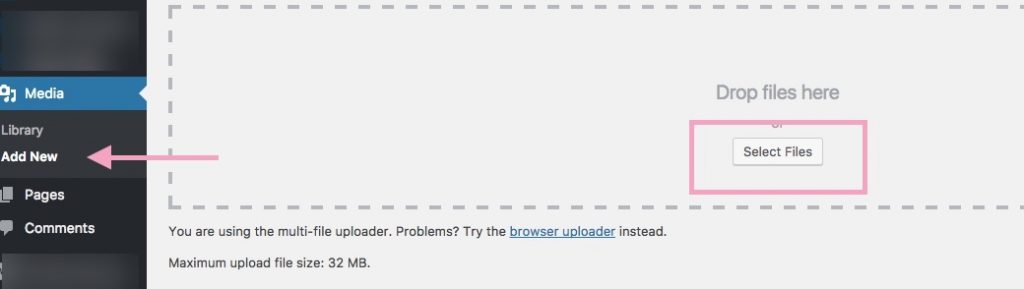
Once you have your custom signature file (PNG or JPG format work best), go ahead and upload it to the Media Library. After the upload is done, do not close this tab, as we're going to need it in a second.
Step 3: Download the Add Signature plugin
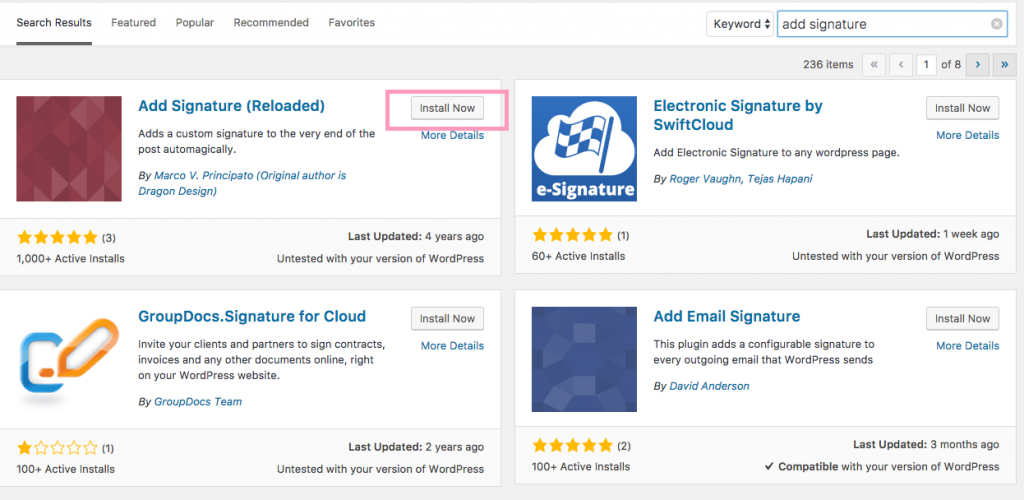
In a new tab, open the Plugins section and go to Add New. In the search bar, type in "add signature". Select the plugin as shown below and install it.
After that, go ahead and activate it.
Step 4: Configure the plugin
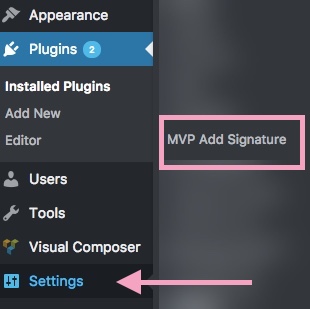
You can now access the Plugin via Settings > MVP Add Signature.
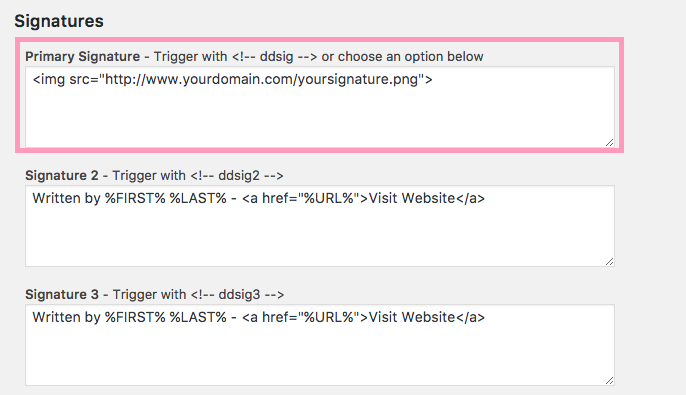
There are only a few adjustments that we need to do. Don't be fooled by the long list of options displayed here, as we are only going to work with the Primary Signature.Copy and paste the following link in the first field, where you insert your signature URL, copied from the Media library.<img src="http://www.yourdomain.com/yoursignature.png">
Here's how to copy the URL from your Library:
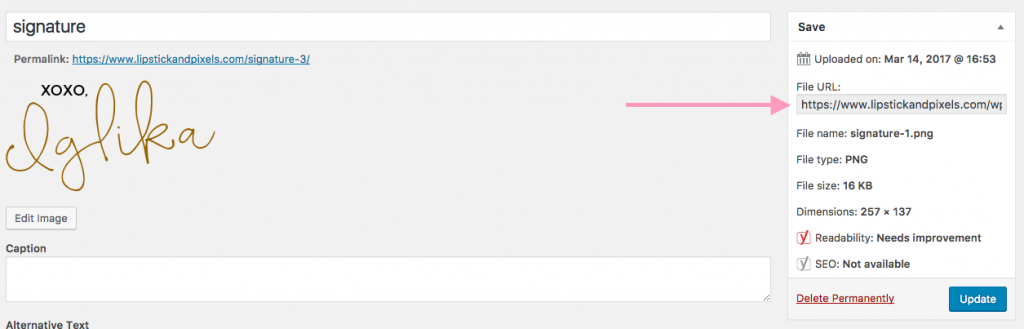
After you replace this with the URL of your signature, specify where you want the signature to appear.
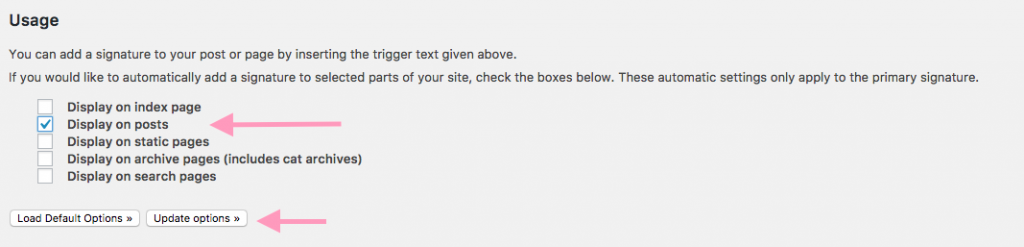
I personally prefer only to have it on my blog, so I checked only the Display on posts option. You can decide if you need additional placements. Once you're done, hit Update Options. This is it- now you know how to add a custom signature to Wordpress!